
ADVANCED
Once you have gone through the key features of a standard page, there are some of the other important components that you might want to add to a page.
The most commonly added components are FAQ Accordions, Mixed Pods and Content Items. These must be created in the Content Editor underneath the main page, and then added onto the page using the Experience Editor.
The Experience Editor allows you to move, add or remove components beyond the provided webpage templates.
Opening a Page
To open a page in the Experience Editor, click the icon on the Sitecore Launchpad. To navigate to your chosen page, ensure that the navigation bar box is ticked in the view tab (you will only have to do this the first time you use the experience editor).
To navigate to the page, you need to use the navigation bar to select the page you require. To go to the page, click Go.
Note – if at any time you cannot see any of the navigation bar, click on the down arrow at the top right corner.
Editing a Page
To edit any content on the page, click on the area you want to edit and then click on the pencil icon in the content tab.
This then opens the Rich Text Editor and you can edit the content in the same way you do in the Content Editor.
To publish the page click Publish.
Accordions are vertically stacked headers that can be expanded to reveal further content in a drop down list. As the name suggests, this component is a great way to display frequently asked questions or any information you would wish to break up into smaller categories. This is a good way of making sure a page with a lot of content is not overly long, requiring a lot of scrolling.
To add the accordion item to the page, you first need to create your accordions and their content using the Content Editor.
In the Content Editor, locate the page you want to add the accordions to, right click and select Insert Accordion Items Folder. If you cannot see the Accordion Items Folder click 'Insert from Template' and select it from the Accordions Folder. You will be prompted to name the folder. You can do this, but it isn’t compulsory as this is not displayed on the website.
To add an accordion:
- Right click on the Accordion Item Folder and Insert an Accordion Item
- Name the accordion, this name displays in the accordions header on the website
- Once you have named the accordion, you can add your content in the content field using the rich text editor
To add more accordions repeat steps 1 - 3.
Once you have created all of your accordion items, go to the publish tab and select the Experience Editor. To add the accordions, click on the Add Component icon found in the top left hand corner of the toolbar next to the save icon, or in the Home tab toolbar.
The experience editor will show all of the places on the page that you can add a component to. You need to add Accordion items into the main page content. To do this, click on the + Add here icon, the components box will display and locate the FAQ – FAQ Accordion item. Before clicking Select, make sure to tick ‘Open the Properties dialog box immediately’. Under Data Source, click Browse, and navigate the site tree to Accordion Items Folder you created. The accordions are then added to the page. To publish the page, click Publish.
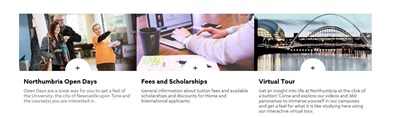
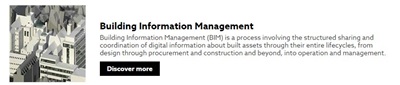
Pods are tiles that can be used to navigate to a page in a more visual way than a simple text hyperlink. There are various styles and sizes of pods to choose from: including those that display an image with text overlayed, a video inside the pod, a list of links inside the pod and some more advanced designs that will be explained in a future course.
To add pods to the page, you first need to add the pod images into the Media Library. For guides on how to do this, please refer to the Media Library section within the Support Hub. Once you have published your images within the Media Library, go to the Launchpad and select the Content Editor.
In the Content Editor, locate the page you want to add the pods to, right click and select Insert Mixed Pods Folder. You will be prompted to name the folder. You can do this, but it isn’t compulsory as this is not displayed on the website.
To add an image pod:
- Right click on the Mixed Pods Folder and Insert Image Pod
- Give the pod a title, as this name displays on the pod itself
- Once you have given the pod a title, you can also give the pod a subtitle, which will appear underneath the title within the pod
- Under ‘image’, select Browse and navigate the Media Library to your chosen image
- Once the image has been selected, under ‘link’ select Insert Link and navigate through site tree to select the page that you want the image pod to link to
Once you have created all Mixed Pod items, go to the publish tab and select the Experience Editor. To add the pods, click on the Add Component icon found in the top left-hand corner of the toolbar next to the save icon, or in the Home tab toolbar.
The experience editor will show all the places on the page that you can add a component to. You need to add the Mixed Pods items into the main page content. To do this, click on the + Add here icon, the components box will display, and locate the 'Pods - mixed pods grid V2' item. Before clicking Select, make sure to tick ‘Open the Properties dialog box immediately’. Under Data Source, click Browse, and navigate the site tree to the mixed pods folder you created. The mixed pods are then added to the page. To publish the page, click Publish.
Short URLs are used to make URLs substantially shorter and still direct to the required page. These may also be referred to as ‘vanity URLs’.
To create a short URL, you first need to navigate to the URL Rewrite Folder, which sits within Local Config within the site tree.
Next, navigate to the relevant folder for your short URL, then right-click on the folder > insert to add a new ‘Simple Redirect’.
When naming the URL, you would need to make this the same as what you want the short URL to be. For example, if you wanted the short URL to be northumbria.ac.uk/undergraduate, then the title would need to be ‘undergraduate’. (You can have a look at other redirects to get an idea).
Once the short URL has been created, the ‘Path’ should have already been added in and match the title. You will then need to click ‘Insert link’ in the Target section below, and navigate the site tree to the page you are wanting the short URL to direct to.
When both the Path and Target field are filled in, the final step is to submit for publish. To do this, you go to the Review tab and select ‘Submit’, and then ‘Approve’. This will add the redirect into the publishing queue.
In the Navigation section of a page in Sitecore, tick Hide In Navigation - Hide this item in navigation lists (e.g. primary/secondary nav, pod lists. etc).
Next, in the SEO section, select all Robots (noarchive, nofollow, noindex, noodp, nosnippet, noydir). This is so that nothing gets indexed by Google and can't find the page on the website or through search.
You must then go to the Search section, tick both Exclude From Section Search and Exclude From Site Search. This will ensure that the page cannot be found via the search function on the Uniersity Website
Finally, Publish the page in order for these changes to take effect.
When you no longer want the page to be hidden, simply untick all of the above and re-publish the page.
In order for the website to remain professional and performant, it is important that images are correctly sized and that file sizes aren't too large.
The correct specification for each type of image is listed below. All dimensions are in pixels, and follow the convention width x height.
It is important to ensure that images are no higher than 72dpi. Image file sizes should not exceed 150kb.
| Horizontal pods |
380x190
|
 |
| Side pods | 255 x 190 |  |
|
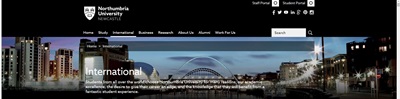
Large hero banner |
1920 x 580 150kb |
 |
| All other hero banners |
1920 x 420 150kb |
 |
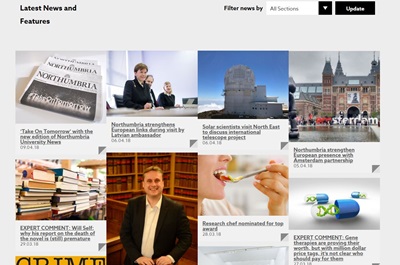
| News pod |
275 x flexible height 50kb |
 |
| Events pod |
255 x 150 40kb |
 |
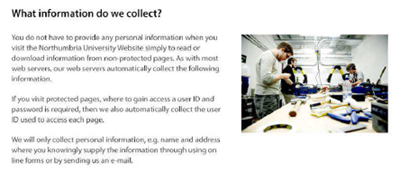
| Image embedded within content |
350 x flexible height 60kb |
 |
| Video embedded within content | 770 x flexible height |  |
| Course listing | 190 x 190 | 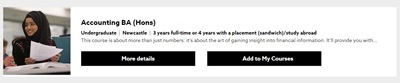 |
| Course detail - career progression background |
1920 x 580 150kb |
 |
| Course detail - alumni profile pod |
380 x 190 50kb |
 |
| Course detail - student quote pod | 285 x 210 |  |
| Department list | 375 x 125 |  |
| People list |
255 x 255 50kb |
 |
| Alumni profile - video background | 1000 x 500 | 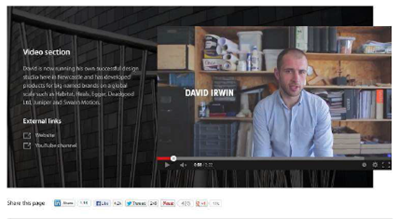 |
| Video gallery |
255 x 150 40kb |
 |
| Showcase images | 600 x flexible height | 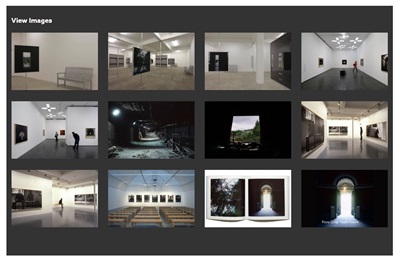 |
| Case studies |
190 x 190 30kb |
 |
Auditing image sizes on your web pages is a good way to ensure pages aren't hosting images which are too big. This can slow down the page loading time for users.
You can follow the below steps to audit your web pages:
- Open the website using Chrome
- Select the page you wish to audit
- Press F12 to open the 'Developer Toolbar'
- Select Network > Image > Refresh the page > Use the arrow next to 'size' to order the images from low > high or high > low
- Note: Images should be no larger than 150kb
