MEDIA LIBRARY
Below you will see various applications in the Sitecore Experience Platform available for you to use. If at any time you would like to return to this dashboard, you can click the Sitecore home icon in the top left corner.
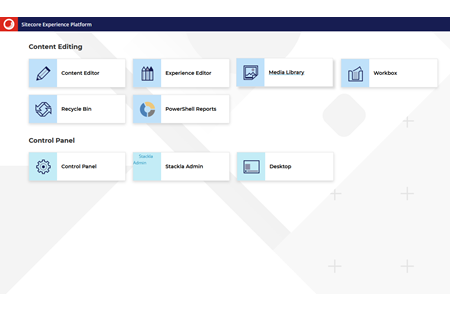
The Content Editor is an editor tool used to edit and manage all the content on the Northumbria University website.
The Experience Editor allows you to move, add or remove components beyond the provided webpage templates.
The Media Library is where media content such as images and documents are uploaded and maintained.
The Control Panel allows you to change your account information, including your password.
The Recycle Bin allows you to view or restore your deleted items.
*If you have forgotten your login details, please email bc.digital.marketing@northumbria.ac.uk and request an account reset.
Standard web-pages will display images and may often contain links to relevant documents the user may want to read. All images and documents you see on the University webpages are stored in the Sitecore Media Library.
Users can upload, update and delete images and documents in the Media Library, which can then later be accessed and attached to your webpage in the Content Editor.
Media File
A media file is the file you attach to either a new or existing media item. Such as an image, a document, or an audio file. The Media Library supports most common file types such as JPEGs and PNGs.
Media Item
A media item is an item in Sitecore in which a media file is attached. A media item is composed of several fields, and it always has a file attached to the media field.
You may want to create a New Media item when you are uploading a brand new file whether that is a word document or an image to use on a page.
To begin, go to the Sitecore Launchpad and select Media Library.
Navigate to the correct folder.
Select Upload File and choose the relevant image or document from your local machine. You can also choose Upload files (advanced) to upload multiple files at once.
Once you have added an image, you will have to fill out the Alternative Text field (alt text).
This is a requirement of Web Content Accessibility Guidelines (WCAG) to ensure images can be read by e-readers for the visually impaired. Please make sure that this field is populated with a short, clear description of the image. For example, 'woman typing on laptop keyboard’.
If the image is text-based, ensure this text is included in the Alt Text field.
Save the changes to the new media item to complete the upload.
Go to the Media Library and navigate to the media item you wish to update.
In the main panel, navigate to the Media File field and select Attach. Select the relevant image or document from your local machine that you wish to replace the previous file.
Save the changes to the media item to complete the upload.
Now your changes have been saved, any page showing the old image or link will now display or link to the new image or document. Please note that this may take up to an hour to display on the live site.
While you are most likely to use the media library to upload and update content, there may also be times where you wish to download media files to your local machine.
To download an image already stored in Sitecore, you need to locate it within the Media Library first. If you are unsure of where the image might be saved within the Media Library, you can check this depending on the image type.
- If the image is 'in page', right-click it and select ‘image properties’, the properties window will appear. You will see a file path in the box named 'choose image'
- If the image is a Banner, Navigation Image, or Profile Image; the file path will show above the image
- Switch to the Media Library and navigate the Content Tree according to the file paths shown
- Select download